Step 1: Prerequisites
🚀 How Staking on Ethereum Works
Acquire some hardware (laptop, desktop, server) or rent a VPS (cloud server): You need to run a node to stake.
Sync an execution layer client
Sync a consensus layer client
Generate your validator keys and import them into your validator client
Monitor and maintain your node
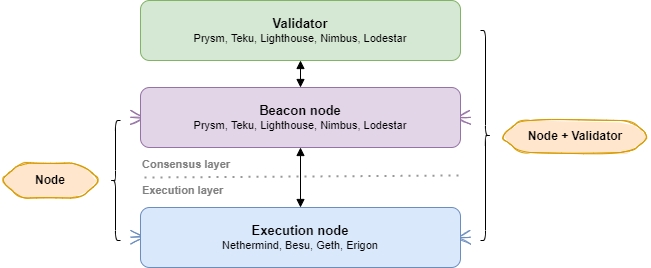
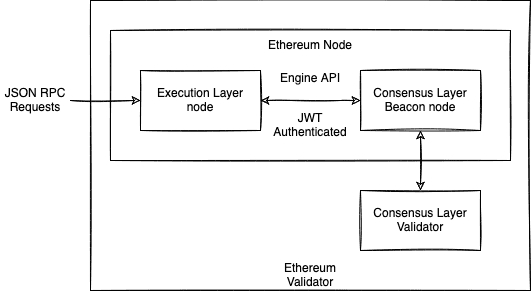
A Ethereum node consists of the Execution Layer + Consensus Layer.
A Ethereum Staking node is the previous plus a Validator client.


👋 Introduction
This guide was written for aspiring Ethereum stakers who have basic familiarity with command line tools and it was tested against Ubuntu 22.04.1 LTS client. You’ll want a dedicated cloud VPS or local desktop/server/laptop running a clean install of Ubuntu preferably.
Terminology
Your Ethereum staking node may be
Local: on a laptop / PC / NUC that you can physically connect keyboard/mouse/monitor.
Remote: in the cloud on a VPS
If your staking node is remote, then you will want to setup SSH, secure shell.
If using a VPS or remote node, install and start the SSH client for your operating system:
Windows: PuTTY
MacOS and Linux: from the Terminal, use the native command:
Here's a guide from Makeuseof to connect by SSH to your remote node.
⚒️ How to Run Commands
Commands are to be run in a terminal window or ssh terminal.
Commands preceded by
sudowill prompt for your password at first, and periodically afterwards.
👩💻 Skills for operating an staking node
As a validator for Ethereum, you will typically have the following abilities:
operational knowledge of how to set up, run and maintain a Ethereum consensus client, execution client and validator continuously
a long term commitment to maintain your validator 24/7/365
basic operating system skills
👨💻 Experience required to be a successful ETH Staker
have perused the vast tomes of the EthStaker Knowledge Base
have learned the essentials by watching 'Intro to Eth2 & Staking for Beginners' by Superphiz
have passed or is actively enrolled in the Eth2 Study Master course
and have read the 8 Things Every Eth2 validator should know.
🎗️ Minimum Node Setup Requirements
Operating system: 64-bit Linux (i.e. Ubuntu 22.04.1 LTS Server or Desktop)
Processor: Dual core CPU, Intel Core i5–760 or AMD FX-8100 or better
Memory: 16GB RAM
Storage: 2TB SSD
Internet: Stable broadband internet connection with speeds at least 5 Mbps upload and download.
Internet Data Plan: At least 2 TB per month.
Power: Reliable electrical power. Mitigate with a Uninterruptible Power Supply (UPS).
ETH balance: at least 32 ETH and some ETH for deposit transaction fees
Wallet: Rabby Wallet installed
🏋️♂️ Recommended Node Setup Requirements
Operating system: 64-bit Linux (i.e. Ubuntu 22.04.1 LTS Server or Desktop)
Processor: Quad core CPU, Intel Core i7–4770 or AMD FX-8310 or better
Memory: 32GB RAM
Storage: 4TB NVME
Internet: Stable broadband internet connections with speeds at least 10 Mbps without data limit.
Data Plan: At least 2 TB per month. Ideally, no data cap or unlimited data plan.
Power: Reliable electrical power with a Uninterruptible Power Supply (UPS).
ETH balance: at least 32 ETH and some ETH for deposit transaction fees
Wallet: Rabby Wallet installed

✨ Pro Validator Tip: Highly recommend you begin with a brand new instance of an OS, VM, and/or machine. Avoid headaches by NOT reusing testnet keys, wallets, or databases for your validator.
🖥️ Local Node vs Remote Node
Decision: Do I run my Ethereum staking node locally at home or rent a VPS cloud server remotely? Here's a list of criteria to help you decide.
Ongoing Costs
Plus - No fees, besides internet bill and electricity.
Minus - Monthly or Annual reoccurring rental fees.
Hardware Maintenance
Minus - Do it yourself if hardware issues.
Plus - Included, covered by hosting provider.
Internet
Minus - Can slow down home internet and use up data plan (if not unlimited) Budget for at least 2TB per month data plan.
Plus - Often plans are generous and more than sufficient for an ETH node.
Reliability
Minus - Do it yourself with UPS, redundant internet connections, computer issues
Plus - Hosted in a data center with multiple power/internet backups.
Barrier to Entry
Plus - Can re-use or re-purpose existing hardware Minus - Initial cost to purchase new computer equipment
Plus - Renting a VPS might require a lower initial investment as you can pay monthly.
Decentralization
Plus - Home staking is the gold standard for Ethereum decentralization, nothing bets it!
Minus - VPS cloud hosts like Netcup or AmazonWebServices are by nature more centralized.
Customization
Plus - More fine control over hardware configuration
Minus - May be limited choices and hardware can be shared. For example, a common issue is insufficient disk storage I/O speeds (IOPS).
Security
Plus - As secure as your home and personal OPSEC
Plus - Enterprise-grade, professional data centers.
Minus - Not your hardware, not your node. It's possible the hosting provide can view your node's contents.
Freedom
Plus - Do whatever you want. Plan your own upgrades. Minus - With great freedom and power, you are solely responsible for your node.
Plus - Professionally managed.
Minus - At the mercy of the host's actions, data center outages are possible.
🛠️ Setup Ubuntu
With your local or remote node, now you need to install an Operating System. This guide is designed for Ubuntu 22.04.1 LTS.
To install Ubuntu Server or Desktop, refer to this guide.
Tip: When installing Ubuntu Server, ensure you are selecting “Use an entire disk” on the Guided storage configuration screen. Next screen will be the Storage configuration screen, ensure your settings are using all available disk storage. A common issue is that Ubuntu server defaults to using only 200GB.
🎭 Setup Rabby
When the time comes to make your validator's 32ETH deposit(s), you'll need a wallet to transfer funds to the beacon chain deposit contract.
To install Rabby, visit their official site.
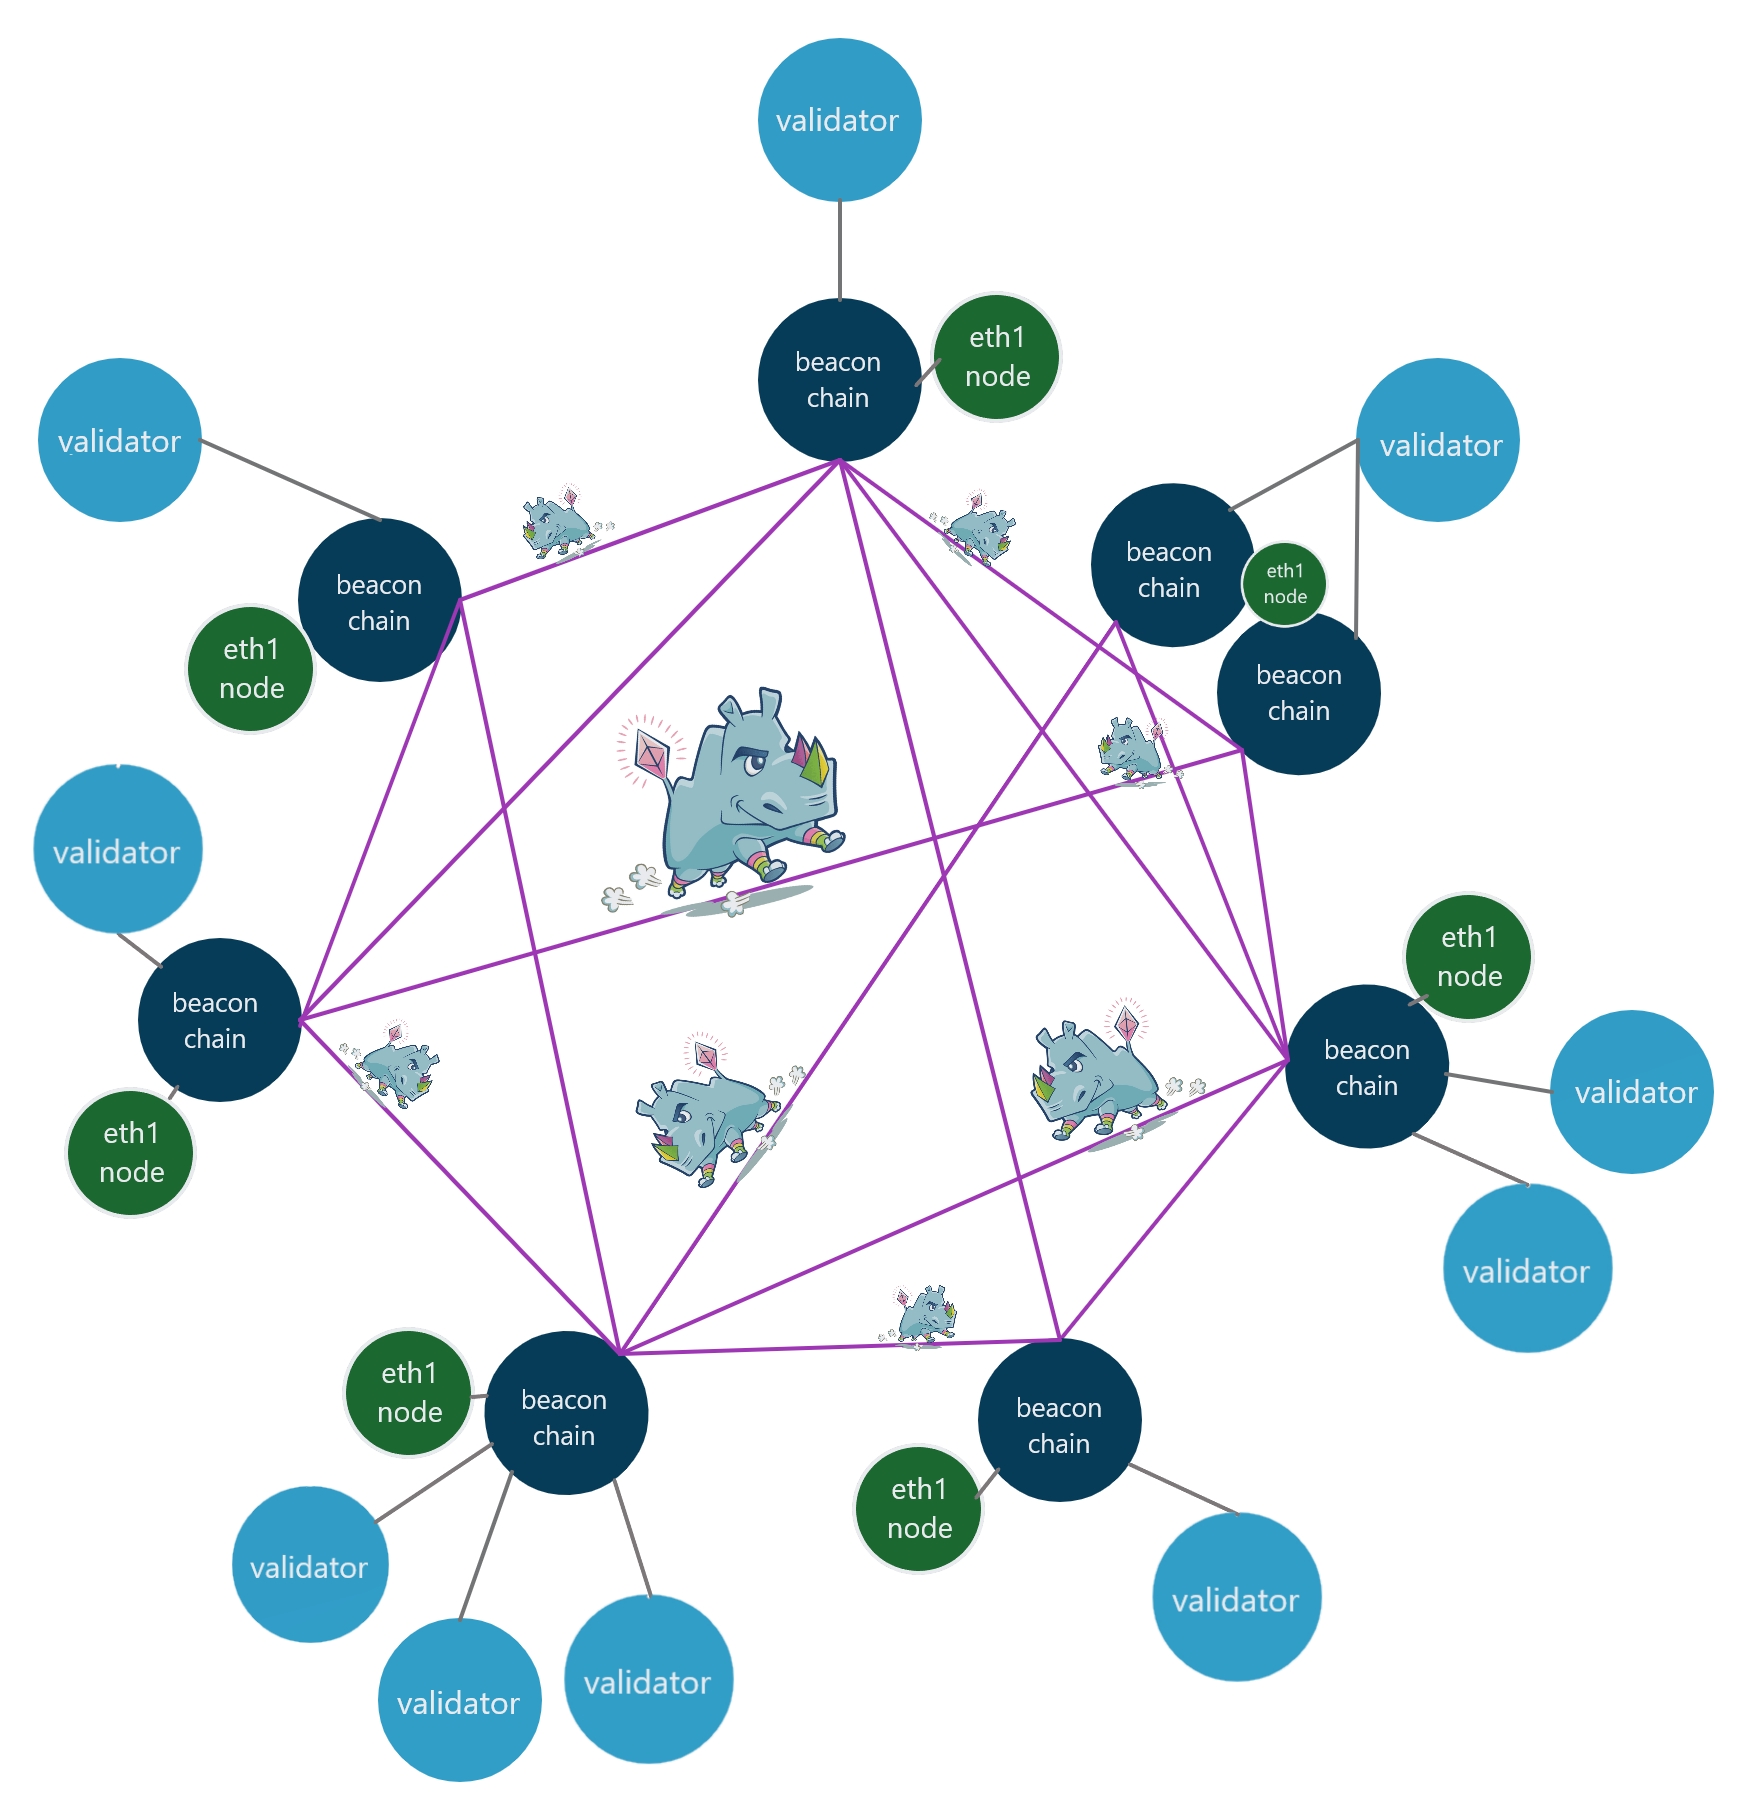
🧩 High Level Validator Node Overview
